Why a Reflection Breaks Before the Shore Does
Why a reflection breaks before the shore does: read ripples and viewing angle, then choose a camera position that makes the lake’s surface legible.
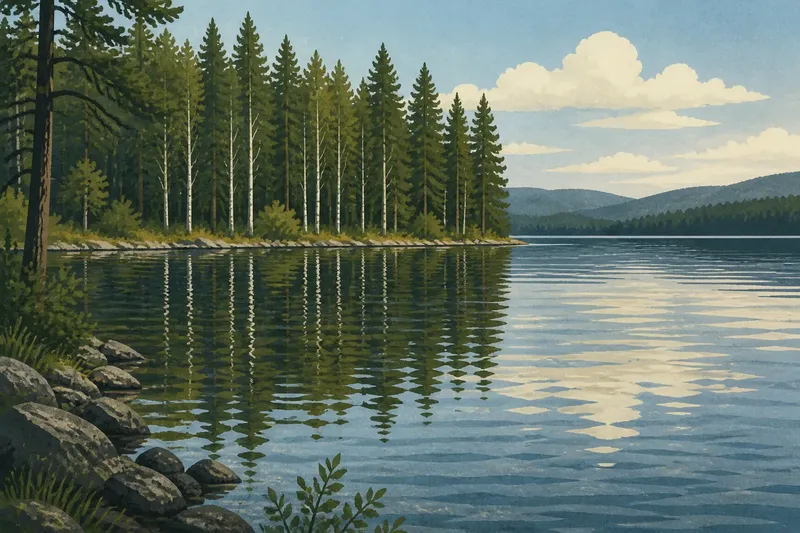
You frame a pine-covered bank across a lake, but its reflected trunks look chopped into dark stripes. The shoreline stays crisp while the water seems to erase the scene. If you’re asking why a reflection breaks before the shore does, start with the surface: even small waves tilt its patches away from the angle that would send a clear image to your camera.
That break is not always a flaw. The shore records the edge of the land; the reflection records what the water is doing between you and that edge. A few controlled adjustments can reveal whether you want a recognizable mirror, a readable reflection, or a surface that makes the lake’s movement part of the picture.
Why does a reflection break while the shore stays sharp?
Land and water return light in different ways. A shoreline contains fixed edges, textures, and shadows that remain in place as you shift your camera. A reflection depends on light arriving at a particular part of the water and then reaching your lens. When a ripple changes the surface angle, that patch sends light in a different direction. Its reflected branch or cloud may slide, bend, or vanish from view.
Think of the reflected image as a pattern assembled across many tiny surfaces. A calm patch can show a clear trunk; the neighboring patch may return bright sky instead. Waves stretch the reflected shape along their crests and compress it in troughs. The tree has not changed, but the route its reflected light takes has.
This is why a sharp bank can sit above a broken mirror. The camera may focus well on both, yet sharp focus cannot restore reflected light that never reaches the lens. Changing focus can help if the near water or distant land looks soft. It cannot straighten ripples or make an unfavorable reflection angle behave like a still surface.
Is the problem ripples or your viewing angle?
Before moving equipment, watch the reflection for a moment. If reflected branches bend, flicker, or break apart in repeated bands, small waves are likely driving the change. If a shape stays consistently absent or appears only when you lean or step sideways, your position is probably limiting what the water reflects toward you.
Angle matters because the surface acts like a mirror only for light arriving and leaving along compatible paths. A low viewpoint often includes more of the water and can make a reflection seem longer. It also changes which parts of the surface send light toward the lens. A small sidestep may reveal a reflected treeline that looked blank from the first position, or make the sky dominate instead.
Use the screen or viewfinder to compare rather than guessing from the scene alone. Keep the focal length and framing close, then move a short distance along the bank. If the reflected shapes shift while the shore barely changes, the angle is affecting the image. If the reflected shapes keep deforming in place, the water is moving; waiting for a lull may be more useful than searching for another viewpoint.
Why does a reflection turn into bright glare?
A bright patch can wash out reflected detail even when the water looks nearly still. Sunlight or a bright section of sky may be reflecting straight into the lens. That glare occupies the same part of the frame where you hoped to see trees, clouds, or rock. It is a surface-and-angle problem, not necessarily an exposure mistake.
Try a modest change in camera height or position and watch the bright patch move. A circular polarizing filter can reduce some reflected glare when turned, but its effect varies with the direction you face and the angle of the water. Look through the viewfinder while rotating the filter slowly, and stop where the surface retains the amount of reflection you want. Do not turn it automatically to its strongest effect: removing nearly all visible reflection can make the water feel flat or unnaturally dark.
Exposure can still matter. If glare is much brighter than the surrounding reflection, the camera may render it as a blank white area. Check the image preview and highlights, then adjust exposure if needed. But exposure compensation will not recover detail from a surface that is reflecting the sun rather than the scene.
What should you change first when the reflection looks wrong?
Change one condition at a time so you can tell what altered the picture. First decide whether you want the reflected object to remain identifiable or whether its broken shape is useful. Then try these adjustments in order:
- Watch the water. Look for a brief calm interval between passing ripples. If the reflection clears during that lull, time the frame for the quieter moment rather than changing focus.
- Shift your position. Step sideways along the shore or adjust your height slightly. Check whether a different part of the surface now returns the reflected subject.
- Reconsider the frame. Move the horizon or reflected subject within the composition so the most legible section of water has room. Avoid treating every broken patch as a defect that must be hidden.
- Try a polarizer only if glare is the issue. Turn it while viewing the scene and compare the reflection before and after. Keep enough reflected light to preserve the shape and atmosphere you came to photograph.
- Check focus and exposure separately. Use a stable focus point on the intended subject, then inspect bright areas in the preview. These controls address softness and brightness, not wave distortion.
Say you’re photographing a row of birches opposite a public dock. A breeze keeps breaking their reflected trunks into short, bright-and-dark bars, though the trees themselves remain clear. You wait for a softer patch of water, move a little along the dock to bring the trunks’ reflections away from a glare streak, and make a frame when the bars still show the lake’s texture without hiding every recognizable shape. The expected result is not a perfect duplicate of the trees, but a reflection that reads as both birch and moving water.
When can a broken reflection describe the lake better?
A glassy reflection can make the lake resemble a second landscape turned upside down. That can be striking, but it may also hide the water’s character. Fine ripples split a cloud into wavering bands; a gentle wake turns a reflected reed into a repeated rhythm. Those distortions tell the viewer that the image is happening on a surface, not on a second shore.
Look for breaks that support the subject rather than compete with it. A few bent lines can echo the angle of a leaning tree or lead toward a bright opening in the bank. A broad strip of glare might divide the reflection so strongly that the shoreline and its echo no longer feel connected. The useful question is not whether the reflection is intact, but whether its changes help the viewer read the scene.
Keep the reflected shapes large enough to recognize if recognition matters. If the water’s movement is the subject, let those shapes loosen and repeat, while retaining a clear reference such as a visible bank, dock post, or tree line. That anchor helps the viewer understand what the water is distorting.
What if the reflection still feels confusing?
Should I focus on the water or the distant shore?
Focus on the subject whose detail matters most, then inspect the other parts of the frame. A reflection may appear softer because its surface is changing, not because the lens missed focus. Refocus only when a stable object that should be sharp is visibly soft.
Will a faster shutter speed freeze every ripple?
A faster shutter can reduce blur from moving water, but it cannot make every ripple reflect the same shape. The surface still redirects light patch by patch. Choose the shutter setting for the motion you want to show, and use a quieter moment if recognizable reflected forms matter more.
Does a polarizing filter remove reflections?
It can reduce some reflected glare, depending on your angle to the water and the light. It does not erase all reflections in every position. Rotate it while watching the image, and choose the setting that keeps the surface readable without stripping away the reflected subject.
Why does the reflection look different in the image than in the viewfinder?
Ripples can change between composing and exposure, especially when wind or passing boats disturb the surface. The camera also records a single moment, while your eye has been watching many changing versions. Check the preview and make another frame if the water’s pattern has shifted.
How can you decide when to stop correcting it?
Compare the shoreline with its reflected counterpart and ask what each contributes. If the reflection has a recognizable outline, enough contrast to separate it from glare, and a pattern of ripples that fits the mood you want, it may already be doing its job. A perfectly smooth surface is not the only evidence of a successful lake photograph.
For a useful reflection photograph, identify the cause before reaching for a correction: waves deform shapes, angle changes what is returned to the lens, and glare can cover detail. Make a small adjustment that addresses that cause, then judge the whole frame. The reflection breaks before the shore does because the water is part of the subject, and its interruptions can give the picture information a still mirror would leave out.